Choosing the Perfect Backpack

Choosing the Perfect Backpack

Choosing the Perfect Backpack

Choosing the Perfect Backpack

Having the wrong backpack can make any hiking or camping adventure miserable. When out in the backcountry, you are living out of your backpack and it will be carrying everything you need for survival, so it had better be up to the job.

One of the biggest mistakes people new to camping and hiking make is it to over pack, and then somewhere along the trail they are looking to see what items they can discard. Most experts will tell that you should not attempt to carry more than 25 percent of your body weight and up to 30 percent if you have been conditioned to carry a pack. For example, a 150-pound person should be able to carry 37.5 pounds and a 200-pound person should be able to carry 50 pounds. Now that you know what weight you can carry, you can begin looking at packs.

However, buying a bigger pack than what you need is not a bad thing, just remember just because you have the room does not mean you have to fill it. It is better to have the option so at some point down the road you can add more items if you need to, leave yourself options and after getting better conditioned you may find you can carry more after all.

These are only approximations and before venturing out make sure you can handle the weight, and remember there is a difference in carrying a pack on flat even terrain versus hilly uneven terrain out in the wilds.

Once loaded the pack should hold the items securely. You do not want a bulky sack banging around on your back and all the items bunched up at the bottom. Your pack should have kidney pads and a waist belt so your hips can help take up the weight and to prevent the pack from hitting your lower back as you move. You pack should have pockets and compartments where various items can be secured so they do not all end up at the bottom.

The pack should have some type of internal frame system so the pack holds its shape once packed. The pack should not extend beyond your body more than a few inches on either side once shouldered and fully packed.

Outer pockets are ideal for maps and water bottles that need to be accessed frequently. You should have straps on the exterior of the pack for securing a sleeping pad and a sleeping bag on either the top or bottom. However, you do not want items stacked so high on the top of the pack that your head hits on the items while walking.

You will want a pack that is waterproof or at least water resistant. Not many backpacks can take being dumped overboard and left in the water if you are rafting or canoeing. You should however expect it to protect your supplies during a rain or snowstorm long enough so you can get a poncho on or find cover.

Fit the backpack before purchasing. If you go to an outdoor store, you can have a pack fitted and typically, weights are added so you know how the pack feels when loaded. There are various sized packs so it is important that it fits well around the shoulders and does not hang below the waist to where it would interfere with walking. Once loaded adjust the shoulder straps and a quality pack will allow you to adjust the straps while the pack is shouldered.

Communications during a Crisis Using Citizens Band/Two Way Radios

Communications during a Crisis Using Citizens Band/Two Way Radios

Communications during a Crisis Using Citizens Band/Two Way Radios

Communications during a Crisis Using Citizens Band/Two Way Radios

Connect with others on a daily basis using a multitude of platforms, from simple hardwired telephones in the home to satellite communications and cellular services.

Many use the Internet for communications, to talk with others and to gather information and news on a daily basis. Some people are online for hours a day connecting with others using various means. Communication with others daily is considered essential for most people in today’s world.

People are connected 24 hours a day, and they can connect wherever they happen to be. The downside to this marvelous technology is the world’s dependency on it and the truly fragile nature of the technology. Natural and manmade disasters in a matter of minutes can destroy or damage what has taken years to achieve. You can awaken one morning to find the country or world has gone silent.
Can you communicate when the Internet is down, cell service is gone, satellites have stopped circling the globe and there is no longer a dial tone when you pick up your home phone?

Tried and True Means of Communications during a Crisis

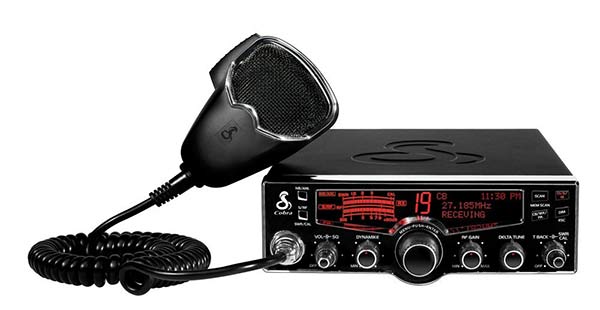
Citizens Band (CB) Radios became popular in the 1970’s due in large part to several movies and songs highlighting their use. They where traditionally used by long distance truck drivers. Drivers used the radios to warn each other of road conditions, weather problems and to help drivers avoid speed traps.

It was not long before CB radios where in homes and small vehicles. The Federal Communications Commission (FCC) had previously required licensing for all CB radio operators but because of the increase in popularity of the radio in the 1970’s they were deluged with applications so they decided to suspend the licensing requirements but they did and still do regulate transmitting wattage.

Anyone can own a CB radio and they can be installed in your home (base station), vehicle (mobile) or they can be handheld all without a license. You cannot however modify the transmitting wattage, which are 4 watts in AM and 12 watts using Single Side band (SSB). This means depending on terrain and weather conditions you can transmit up to or exceed five miles in some cases. Much depends on your antenna set up and whether it is a base set up, installed in a vehicle or hand held.

You cannot tie up a channel by playing music or essentially babble incessantly on any single channel. There are 40 channels on a CB radio. Channel 9 on the CB radio is designated as an emergency channel, and any abuse of this channel by anyone can lead to prosecution by federal authorities. Channel 19 is the traditional channel for truck drivers.

CB radios are ideal as a means of communication during a crisis because there is not any centralized system. Any CB radio can communicate with any other CB radio at any time. The radios transmit within the 27 MHz range.

You must have the means to power the radios either by having it use your vehicle’s 12Volt system, use your homes’ household current such as with a base station or by batteries. A base station will use a power adapter to convert down to the 12 Volts needed to power the radio. Handhelds are battery operated and in some cases may include a power adapter so you can power them from household current or by using your vehicle’s 12 Volt systems.

Two-Way Radios (Walkie-Talkies)

Most Walkie-Talkies/two-way radios are essentially the same but the range and channels you can use depend on whether you have a license to operate on those channels or not. In 1996, the FCC allowed frequencies/channels for family use that do not require a license. This was called the Family Radio Service (FRS). The FRS has a dedicated set of channels on a two-way radio/Walkie-Talkie that you are allowed to use without a license. If you obtain a license, you can use the General Mobile Radio Service (GMRS).

The FRS uses the 462-467MHz range and is typically channel 1-14 on the handheld radio, and is allowed one half of a watt of transmitting power. The first seven channels are shared channels and can be used by the FRS and the GMRS. Typically, channels 15-22 are reserved for the GMRS only. Because the GMRS allows 5 watts of transmitting power the range is considerably more that the FRS. You can communicate up to 20 miles or more in some cases if you are licensed to use the GMRS. In some cases, you are allowed up to 50 watts of transmitting power, depending on the station under the GMRS but between 1-5 watts are much more common.

Considerations

Communications during a crisis must be simple and dependable. Everyone in the family must be able to use the device so the device must be simple to use, essentially to where you turn it on and press a button. Designate channels for your family so everyone knows which channel first to check in with and then have alternate channels if someone else is using that channel.
Your radio will communicate with any device using the same frequency so there is no expectation that your communications will ever be private. It is important that under some circumstances you do not reveal your location over unsecured channels.

You must always have a means of supplying power to your radios by batteries or power sources such as generators or power converters that can be charged from generators or a vehicle’s electrical system. Keep in mind your vehicle may not be operational or fuel may be a problem so always have back up power sources.

You need to have enough devices so every person in the group has one in the event they become separated. Use the radios to monitor for information by scanning through the channels. In a time of crisis, you may very well want to use the GMRS regardless of your license status to increase your communication range and always monitor those channels for important information.

Choosing a Hatchet for Survival

Choosing a Hatchet for Survival

Choosing a Hatchet for Survival

Fiskars Hatchet
Fiskars Hatchet

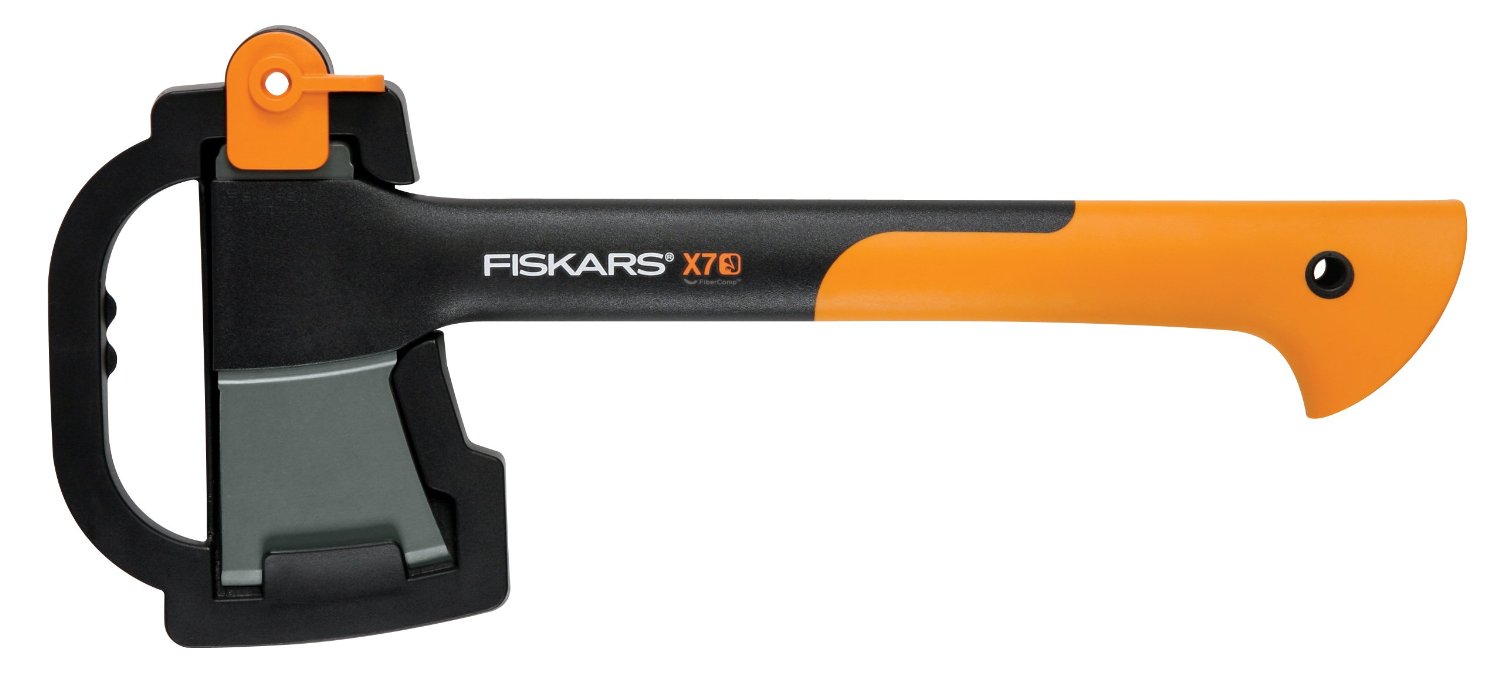
A hatchet or small hand axe is a multi-tool that can be used to cut, chop and hammer if you purchase a traditional type hatchet. The typical hatchet will have a cutting edge and a hammer edge that can be used to hammer nails, break glass for emergency extractions and you can do flint knapping to make arrowheads or even fishhooks. While it is not designed for flint knapping, it can be used for this purpose in emergencies.

In a survival situation a hatchet is indispensable because it can be used to chop wood, or even chop trees down to make shelter, chop through ice to obtain drinking water or to cut a hole for fishing. The striking end can be used to hammer stakes into the ground, smash rocks to make smaller cutting tools or used as a blunt instrument for non-lethal self-defense. The metal of the hatched head can also be used to create a spark for fires if struck with flint/hard stone or you can use with a Ferro rod.

Tactical hatchets while they have a cutting/chopping edge they are typically designed for when you find yourself trapped and have to cut or break your way through a door or even a wall. A tactical hatchet may have slots in the head to shut off gas meters or open the valves on certain oxygen tanks and these are typically carried by first responders or military personnel.

The piecing spike would be used to break through stone, brick, light metal, glass or wood barriers. Typically, a tactical hatchet would be lighter so they are not as useful for chopping larger pieces of wood and most have a straight handle, which can make chopping awkward. The holes in many tactical hatchet heads are designed to lighten the hatchet and do not serve any other purpose. Many of these types are designed for throwing and thus could be considered a self-defense or even a hunting weapon as well.

The typical so-called camp axe/hatchet is ideal for hikers, hunters and campers. You have the cutting edge and hammering edge combined. The shape of the handle is perfect for swinging and delivering blows, and at the same time allowing you to maintain your grip. You can still purchase hatchets with wooden handles and the handle is inserted into the hatchet head. Some prefer wooden handles and others like fiberglass or even all steel handles.

Obviously, a wooden handle will require maintenance to keep the wood from drying out and cracking. If you buy a quality product however, there is no reason why a wooden handled hatchet would not last you a lifetime. Note how the wooden handle is inserted into the hatchet head in the above picture. This means that over time, the head may loosen but on the other hand, you can change handles if you break or splinter it or it otherwise becomes unusable. A one-piece hatchet if for some reason you damaged or broke the handle it would be difficult if not impossible to repair.

Before buying a hatchet, know what you expect it to do. If you are a hiker or camper your hatchet will be expected to chop wood, cut rope and hammer in stakes and in some situations it may be needed for digging holes if you need to search for water or extract edible roots from the ground.
For bug-out-bags, or home emergency kits a traditional hatchet would be ideal as tool for cutting, chopping or even to help extract you from a damaged building. A tactical one is ideal if you are looking for a self-defense weapon that can also be used for chopping, cutting and for making, an emergency egress or used for rescue operations.

Survival UST 30 Day Lantern

Survival UST 30 Day Lantern

Survival UST 30 Day Lantern

Survival UST 30 Day Lantern

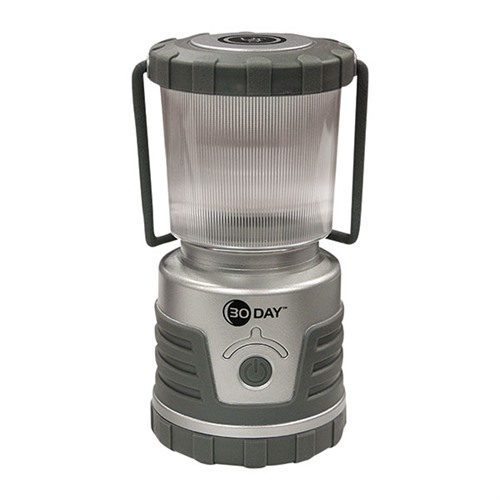
The UST 30-Day Lantern does what it advertises, and anyone would be hard put to find a better battery operated light. The green LED indicator flashes every five seconds so when you do find yourself in the dark you can at least find your lantern. The low mode while not adequate for tasks that require a strong light it does provide enough ambient light to even read by so the room is not in total darkness and you will be surprised at the amount of light you do get on low.

The low setting means the batteries will last for 30 days making this lantern ideal for marking trails or doorways in the home once the power goes out. Just turn it on and let it go and expect up to 30 days of use on the low mode.

The UST 30-Day lantern can be used in virtually any situation inside or out. Make sure you have one in your vehicle so you can alert other motorist you are along the side of the road. Use it for light while working on your vehicle as well. On high, the light is more than adequate for any task that requires a strong light and it can be hung overhead upside down to direct light downward or stand on its own so you have both hands free. The globe is removable so you do have versatility to adapt to any situation.

You can read using the light on the low setting, which makes it ideal for reading a map or even directions on camping or hunting trips. It is comforting to know that on low you have 30 days of use, because if you do become lost or stranded a good signal light may make the difference between surviving and not. The SOS flashing mode is ideal for boaters, hunters or campers that find themselves lost and need to signal rescue personnel or in need of assistance while boating. Hang the lantern upside down inside of a tent and leave it on so you or others can always find the tent in the dark.

The UST 30-Day Lantern is ideal for home emergency kits, car emergency kits and for camping hiking and hunting.

More information: Survival UST 30 Day Lantern

Choosing the Right Sleeping Pad

Choosing the Right Sleeping Pad

Choosing the Right Sleeping Pad

Choosing the Right Sleeping Pad

There are numerous types to choose from but essentially, you want cushioning and more importantly insulation against the cold ground when picking out a sleeping pad. The standard foam pad is probably one of the more popular sleeping pads and they are relatively inexpensive. Foam pads are designed specifically for those on the go and they will stand up to the rigors of camp life.

Because of it solid foam construction there are no worries about punctures and deflation and a few rips or gouges have no effect on the serviceability. The cushioning is adequate but of course, it is not as good as an air mattress. The insulating quality is good to excellent due to the thousands of air cells created in the making of the foam.

Keep in mind there are varying degrees of quality in foam pads so make sure you choose one adequate for your needs, and always know the type of country you are planning to hike or camp in.
A foam pad provides more insulating qualities than it does cushioning, and many hikers and other outdoor enthusiast choose them specifically for their insulating properties because in cold weather having insulation between you and the ground can prevent hypothermia.

Foam material can absorb moisture over time but this has no effect on the insulating or cushioning quality. To dry simply unroll and let air dry by turning the mat over occasionally. The mat will provide some measure of protection when used on damp or wet ground but protection can easily be enhanced by placing a waterproof nylon tarp on the ground then place the foam mat on top.

Self-inflating air pads are more expensive, but do provide a greater degree of cushioning and insulating qualities because of the air chambers. The pad when deflated is easily rolled up and secured to the outside of the pack. However, they can be punctured by sharp rocks or sticks and this would be problematic if you were in the backcountry.

The self-inflating sleeping mats are waterproof and can be used on wet ground but again they can be punctured so it is recommended that you use a quality nylon tarp as a protective surface to lay the mat on. If used inside of a tent then the tent floor would provide some level of protection against punctures.

Air mattresses or sleeping pads that you have to inflate manually are probably the least desirable because of the effort required to inflate them especially if you do not have a portable air pump. There are rechargeable battery boxes/power converters that have air pumps or you can carry a portable air tank if you are camping in one place.

If you carry this type while hiking you will have to inflate using your own lungs and this is not desirable after a long day of hiking. Keeping the mattress inflated while hiking would make it near impossible to carry. This type of pad would be ideal for camping trips where you planned to stay in the same place and did not have to deflate/inflate on a daily basis.

Your mattresses needs to be maintenance free, lightweight and can be easily carried with a pack. You do not want to worry about rips, tears, and ending up with no cushion or insulation at all. The self-inflating and the ones you have to inflate manually are likely to come with a repair kit for small holes.

Pick your sleeping pad based on your needs. If you are planning to stay in one spot then a self-inflating sleeping pad will give you good cushioning and insulation, but if you are planning a hiking adventure and are sleeping in a different spot every night then a foam pad would be ideal.

Choosing the Right Sleeping Bag

Choosing the Right Sleeping Bag

Choosing the Right Sleeping Bag

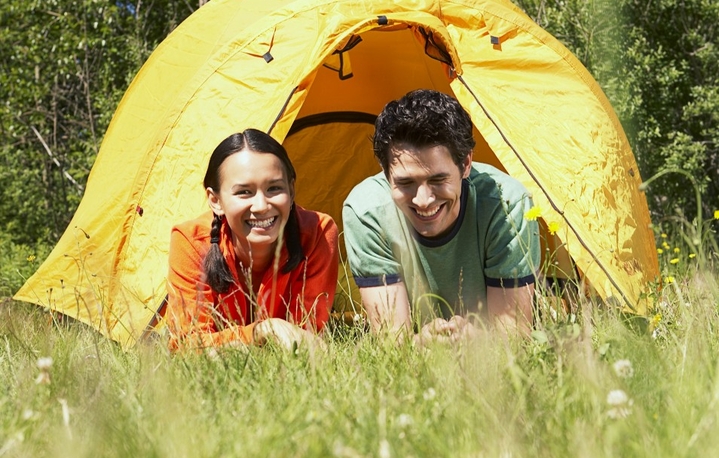
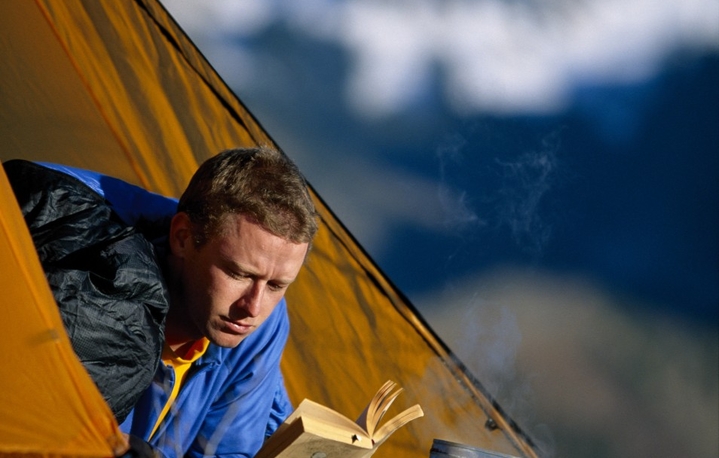
In Sleeping Bag Inside the Tent

You remember the days when you grabbed your sleeping bag and built a fort in the living room or stayed over at a friend’s house. The bag unrolled on the floor and the indoor adventure began, but at the time, you probably never thought of your sleeping bag as a valuable piece of survival gear.

A sleeping bag is not just a blanket to roll up in, it is a shelter from the elements and it can save your life in extreme cold weather if you have the right bag. Not all bags are created equal however, and you must match the bag with your outdoor adventure.

Getting Started

Anyone that has camped in sub zero temperatures would probably agree that a mummy type sleeping bag is better designed to keep you warm. However, some may find it a bit constricting so the open faced one or one that unzips into a large blanket, if you will, may be more desirable in milder climates. In extreme cold areas, you want as much of your body covered as possible however, and this includes the head and the sides of your face so make sure your mummy type bag has a hood that encloses your head and face and the hood should be adjustable.

For extreme cold weather adventures, you would want the bag to be able to protect you at zero degrees or lower. Bags are rated at various temperatures but it is better to have below zero protection even if you do not necessarily need it each night.

There is no standard in the Untied States for sleeping bag ratings such as is the case in Europe where they have the EN 13537 standard. What this essentially means is a bag rated for 20ᵒF from one manufacturer in the United States can differ from another manufacture making the same rating claim because there are no standards.

Make sure the bag is big enough for your body. Mummy bags should have extra material at the feet for warmth and enough room so your feet are not squeezed together. Check the shoulder space to make sure you can move around or even roll over inside the bag if needed.

Type of Fill

Goose down in and of itself is by far the better insulator but once placed in a sleeping bag it does have its drawbacks over certain synthetic materials. Goose down when wet has almost no insulating qualities. While it has “loft”, which means it expands to provide air pockets that are essential to maintaining warmth throughout the night, the down is easily compacted causing cold spots unless the bag is a high enough quality to where the down is in individual pockets inside the lining. The pockets keep the down from spreading thin as you lay on it.

Down filled bags must be dried properly and not stored rolled up to prevent compacting the down. It would be necessary to have a waterproof sleeping bag cover or Bivy, which can act as a shelter if you do not have a tent to protect you from the elements. Once the down becomes wet, it must be dried before storing. Most experts would agree sleeping with wet down in cold weather is more dangerous than sleeping without the bag at all because anyone sleeping on damp material can easily succumb to hypothermia.

A synthetic material such as PrimaLoft® is a microfiber thermal insulator that provides close to the same insulating qualities as down. PrimaLoft was developed specifically for the United States Army in the 1980s. The material is comparable to goose down but it does not lose its insulating qualities when wet and is easily dried and can be stored rolled up tight. Additionally it is considerably less expensive than goose down.

The material does not compact like goose down so it reduces cold spots and can provide more cushioning against the ground. However, with any sleeping bag it is recommended that you use a sleeping mat to providing cushioning and insulation because sleeping bags simply do not provide much protection against the ground.

The bag of course must have a zipper that allows opening from inside the bag. The zipper area should be reinforced with a draft tube along the zipper so there is not a “cold zone”.
The bag should come with a water resistant if not waterproof carry bag that can be lashed to your pack to keep the bag dry during rainy hikes. The sleeping bag must be such that it can be rolled tight when not in use.

Know the climate in the area you will be hiking or camping in so you can be prepared. A bag that protects you at below zero will protect you at below zero and above but a bag rated between 32 and 50ᵒF could create a serious problem if the temperature drops below freezing.

Living and Preparing In Areas Prone To Forest Fires

Living and Preparing In Areas Prone To Forest Fires

Living and Preparing In Areas Prone To Forest Fires

Forest fires are an unpleasant fact in many areas of the country, and most people realize the risk when living in these areas. Fires can happen without warning at anytime of the year or day. This means you must be prepared to evacuate immediately. You may not have time to gather emergency supplies so they should be kept at the ready. Ensure important documents are all in one place so they can be carried with you as you evacuate.

Preparing Your Home

Anyone purchasing or that already owns a home should ensure that the roof is covered with fire resistant shingles, tile or even metal. Outside decking and out buildings should be constructed using fire resistant materials as well.
Experts recommend that you maintain a fire zone that is at least 30 feet around your home. This means removing all dead underbrush and keeping grasses mowed to just a few inches and do not store firewood in this zone. Do not store propane gas grills with the tank attached on any decking connected to the home. The tanks should be a minimum of 15 feet from the house.

Any vegetation will burn if the area has experienced a drought, but pine and fir trees are especially flammable particularly in hot dry climates. Remove any dead trees/limbs immediately and replace with drought resistant trees and plants.

Know all available evacuation routes and map out alternative routes because the main routes will be clogged with others or the roadways and bridges may be impassable.

In ground or above ground pools can be a water source for you or the fire department so if you have a pool it is recommended that you keep it full.

Once You Realize a Fire Is Imminent

Have all emergency supplies and documents already in your vehicle if there is any indication there is a forest fire in the area. Back your vehicle into your garage and make sure all vehicles outside are pointed toward the street.
Shut off your heating or cooling system to prevent smoke from being drawn inside and turn off your gas supply at the meter. Make sure you have a portable radio to monitor for information.
Place a ladder near an outside water spigot so you can reach the roofline and run a garden hose up the ladder so you can water down your roof to extinguish any embers that may land there.
Close all doors and windows but leave the doors unlocked so rescue personnel or firefighters do not have to break down the doors. Turn on the exterior and interior lighting so you home can be seen in heavy smoke. Remove flammable drapes or any material covering your windows.

Once an evacuation order is issued, you must leave before you become trapped. Time is critical and no one can predict how fast the fire may move.

Emergency Essentials

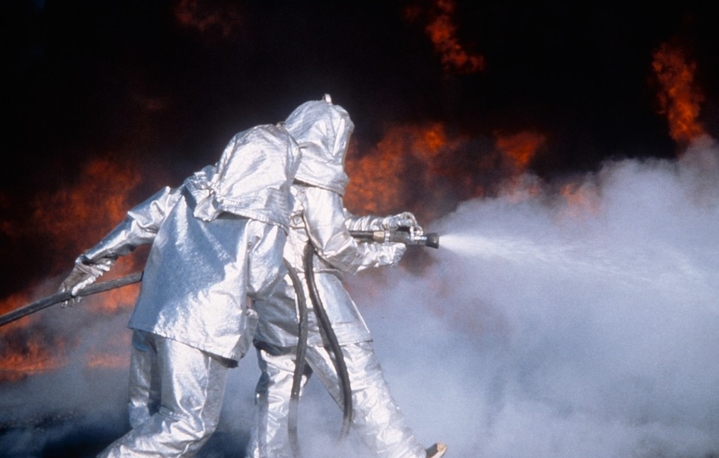
Besides the normal emergency supplies such as food, water and other essentials, you should also consider having a fire shelter. Use the shelters if you cannot evacuate or are caught in the fire as you do evacuate.

According to the manufacturer, this shelter provides protection from direct flame and convective heating.

In addition to a fire shelter, you should also have dust masks if not respirator masks, heavy gloves, shoes, clothing, protective head gear and safety glasses/goggles.

Survival: Finding Water in the Wild

Survival: Finding Water in the Wild

Survival: Finding Water in the Wild

Finding Water in the Wild

Once you find yourself lost or stranded in the wilderness water becomes a priority. The average adult can survive up to three weeks or even longer in some cases, without food. You cannot survive longer than 72 hours however, without water and this timeframe is reduced in hot climates. You may need up to one gallon/four liters of water daily just to replace lost fluids.

Water Sources

Rivers, streams, ponds and lakes are the typical surface water sources in many wilderness environments. In some cases, you may find natural springs or cisterns that are filled from rainfall runoff. Direct rainfall is another source of water as well as morning dew. Morning dew is the condensation of atmospheric moisture that is heated by the sun during the day and as objects cool at night, the moisture will condense on the cooled surfaces. Surfaces where you can collect condensation include vegetation, metal and glass surfaces and pieces of plastic or rain gear you have in your pack.

Surface water sources must be filtered and purified before drinking. Filter using coffee filters, sand, charcoal, gravel, cheesecloth or clean pieces of cloth. Surface water found anywhere in the world is likely to contain harmful bacteria, pathogens and parasites. Surface water can be contaminated by animal and human feces, insects and animal carcasses.

Once filtered boil the water for one minute if you know you are at sea level and for three minutes if you know or suspect you are well above sea level. Water boils at a lower temperature at higher elevations because of reduced air pressure thus you have to boil it longer.
You can also disinfect the water using water purification tablets. Follow the label directions carefully. In some cases, you may have to wait up to four hours before drinking the water after treating with purification tablets.

You can also use two percent liquid iodine (tincture of iodine) to treat surface water. Liquid iodine can be found in many first aid kits and in most pharmacies and retail drug stores. Add 5 drops per one quart/liter of water and shake well. Add the drops only after filtering and then wait 30 minutes. You can double the drops if the water is still cloudy after filtration and then wait up to 60 minutes.

Morning Dew

Lay a rain poncho or any type of plastic over some vegetation before going to sleep. The dew will collect in the numerous wrinkles and depressions in the plastic. You can also absorb the dew off grasses, vehicle windshields, metal surfaces and leafy vegetation using a bandana or any clean absorbent cloth. Squeeze the cloth into a container or directly into your mouth. Dew collected this way does not need to be purified before drinking. In some areas, you can collect up to two quarts using this method. Much depends on the cloud cover and daytime air temperatures however.

Collect rainfall using your poncho or plastic or absorb using clean cloth. You can also drink the rainfall as it drips from known vegetation. You do not want to collect water from poisonous plants.
Arid Environment

You may find yourself in an arid environment where surface water sources are not likely to be available. You can however, find water if you know where to look. First, look for any type of green vegetation because this is an indication of ground water or moisture below the surface. Dry washes are ideal places to find water below the surface in an arid environment. Dry washes are caused usually by flash floods and water may be just a few feet below the surface.

Find a bend in the wash that is shaded and begin digging close to the sides of the wash. If after a foot down the soil is moist keep digging until you see standing water. Once the depression is full, you can filter the water directly into your canteen or cup with a bandanna or any piece of cloth, without purifying it. Ground water is typically safe to drink unless there are obvious surface contaminates that have leeched into the soil.

Look for game trails and once you find where they converge into one trail follow it because this usually leads to a water source. Once you have collected the water, filter it by any means possible and then boil or chemically treat. In arid environments many times small pools are fed by underground springs and if you can find the source of the water it can be consumed in an emergency if you collect it as it bubbles from below ground. Collect the water as close as possible to where it comes out of the ground.
Dew is usually heavy in arid environments so make sure you take advantage of it by following the above-described methods.

Cooking Over Open Fires

Cooking Over Open Fires

Cooking Over Open Fires

At some point, you may find yourself in a situation where you have to prepare your meals over a fire. You may have to do this in wilderness environment or even in your own back yard because a crisis has disrupted your utilities, and in some cases you may find you do not have any cooking utensils, pots or pans.

Сooking on Open Fire

Building Your Fire

For best results dig down between four and six inches, pile the soil to one side, and save. Line the bottom of the pit with flat dry rocks. Do not use rocks that were in the water. The moisture content will cause the rocks to fracture and chips may fly off as the rocks are heated. The rocks provide a barrier between the ground and your fire. The moisture in the soil will inhibit the fire and in very wet soil, you would not be able to maintain the fire. Once you no longer need the fire simply, fill back in with the excavated soil.

Lay flat rocks around the perimeter that can be used as heating surfaces. If you do not have any cookware, you can place your food right on the flat rocks to cook or even bake.

You can build the ring of stones to elevate your cooking surface and place green saplings over the fire for a cooking or drying surface for meats, vegetables or to hold light pans. You do not want the flames touching the wooden grates or the food. The grates will become useless overtime so make sure you keep an eye on them so your food or pans do not fall into the fire.

Cooking by flame will burn the food on the outside, and to get the food done on the inside you would end up destroying the food. Indirect heat is the best method particularly if you are drying or smoking meats for preservation. Let the fire burn down to coals and place you food on the green saplings for cooking. You can enclose the fire pit with a poncho or tarp to help keep the heat confined around the food.

If you cannot make grates out of wood, you can prop several sticks over the fire to drape your food over, and remember to keep the food out of the flames.

Dakota fire pit has an air chamber for feeding the fire. The fire is below ground level and is ideal in windy conditions or in areas where sparks or flame could ignite the surrounding vegetation. The pit also conceals the flame from others at night. With this type of fire pit, you would simply place your cooking pan directly over the fire pit.
In an emergency, you can put holes in a metal coffee can or large food can and use as a stove/cooking surface. Put numerous holes in the can, place hot coals in the can, and place a pot or pan over the top to heat. You will need plenty of air holes because the pot or pan will cover the opening and deprive the fire of oxygen.